At-Home Facial Treatments: Dermatologist Guide
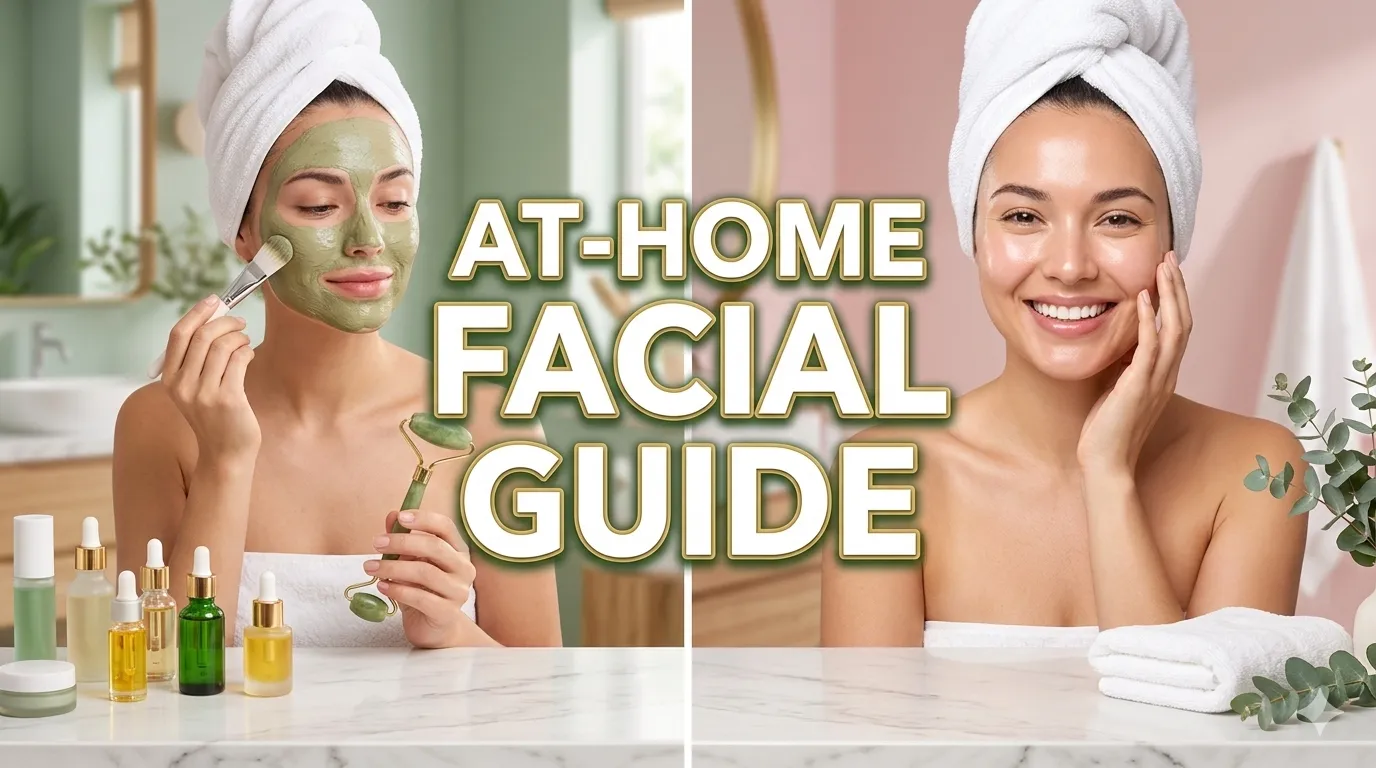
Professional-Grade Skin Care in the Comfort of Your Home
The allure of professional facials is undeniable: expert hands, clinical-grade products, and that coveted post-treatment glow. However, regular salon visits aren't always feasible due to time constraints, budget limitations, or accessibility issues. The good news? With the right knowledge, tools, and techniques, you can achieve professional-level results with at-home facial treatments that are both effective and safe.
At-home facials aren't about replicating the spa experience; they're about understanding your skin's unique needs and applying evidence-based techniques to address them consistently. When done correctly, at-home facials can complement professional treatments, maintain results between appointments, and provide targeted care for specific concerns—all while saving time and money.
This comprehensive, dermatologist-approved guide walks you through the science of effective at-home facials, from preparation and product selection to advanced techniques and safety protocols. You'll learn which treatments are suitable for home use, which require professional supervision, and how to create a customized facial routine that delivers visible, lasting results. Whether you're a skincare novice or an experienced enthusiast, you'll discover how to elevate your at-home practice to professional standards.
Understanding At-Home Facials: Benefits and Limitations
What At-Home Facials Can Achieve
When performed correctly, at-home facials offer several evidence-backed benefits:
Maintenance and prevention: Regular at-home facials help maintain skin health between professional treatments, preventing minor concerns from becoming major issues. Consistent cleansing, exfoliation, and hydration support barrier function and slow signs of aging.
Targeted treatment: At-home facials allow you to address specific concerns (dryness, dullness, congestion) on your own schedule with products formulated for your skin type.
Cost-effectiveness: While professional facials typically cost $75-$200+ per session, at-home treatments require a one-time investment in quality products and tools that provide months of use.
Consistency: The frequency of at-home care (weekly or bi-weekly) often exceeds what's feasible with professional treatments, leading to cumulative benefits over time.
Customization: You can adjust products, techniques, and timing based on your skin's daily condition, something impossible with scheduled professional appointments.
When Professional Treatment Is Necessary
Despite advances in at-home technology, certain treatments require professional expertise:
Medical conditions: Active acne, rosacea flares, eczema, psoriasis, or suspected skin cancer require dermatological evaluation and treatment.
Invasive procedures: Chemical peels stronger than 10% AHA/BHA, microneedling deeper than 0.5mm, laser treatments, and injectables should only be performed by licensed professionals.
Extractions: While gentle self-extraction of superficial blackheads is possible, deep or cystic extractions risk scarring, infection, and post-inflammatory hyperpigmentation when performed incorrectly.
Severe sensitivity: If your skin reacts severely to most products or experiences frequent irritation, professional assessment is essential before attempting at-home treatments.
Scientific insight: Dr. Jennifer Martinez, board-certified dermatologist and cosmetic specialist, explains: "At-home facials are excellent for maintenance and mild concerns, but they're not a substitute for professional care when dealing with medical conditions or advanced treatments. Think of at-home facials as daily exercise and professional treatments as specialized training—both have their place in a comprehensive skincare strategy."
Preparing for Your At-Home Facial: Setting the Foundation
Creating the Right Environment
The success of your at-home facial depends partly on your environment:
Cleanliness: Start with a sanitized space. Wipe down surfaces, wash your hands thoroughly, and ensure all tools are clean. Bacteria introduction during facial treatments can cause breakouts and infections.
Lighting: Good lighting is essential for assessing your skin and ensuring even product application. Natural daylight is ideal; if unavailable, use bright, white artificial light.
Time allocation: Set aside 45-60 minutes of uninterrupted time. Rushing through steps compromises results and increases the risk of errors.
Temperature: Keep the room comfortably warm. Cold temperatures cause vasoconstriction, reducing product penetration and making extraction more difficult.
Gathering Essential Tools and Products
Invest in quality tools that will last and perform effectively:
Essential tools:
- Clean towels: Use fresh, soft towels dedicated to facial use only
- Headband or clips: Keep hair away from face during treatment
- Bowls: For mixing masks or holding water (glass or ceramic preferred)
- Brushes or spatulas: For hygienic product application (never use fingers in jars)
- Facial steamer or hot towels: For opening pores and enhancing product penetration
- Extraction tools (optional): Only if you've been properly trained; otherwise, skip
- Facial roller or gua sha: For massage and lymphatic drainage
Product categories:
- Gentle cleanser: pH-balanced formula appropriate for your skin type
- Exfoliant: Chemical (AHA/BHA) or gentle physical exfoliant
- Treatment mask: Targeted to your primary concern (hydration, brightening, acne, anti-aging)
- Serum: Concentrated active ingredients for specific concerns
- Moisturizer: Appropriate for your skin type and concerns
- Sunscreen: For daytime facials or if using photosensitizing ingredients
Pre-Facial Skin Assessment
Before beginning, assess your skin's current condition:
Check for contraindications: Do not perform a facial if you have:
- Active cold sores or fever blisters
- Open wounds or recent cuts
- Severe sunburn
- Active rash or allergic reaction
- Recent cosmetic procedures (wait 2-4 weeks post-treatment)
Identify primary concerns: Note your skin's current state:
- Dryness or dehydration
- Congestion or breakouts
- Dullness or uneven tone
- Fine lines or texture concerns
- Sensitivity or redness
Adjust your approach: Choose products and techniques based on your assessment. Sensitive skin requires gentler exfoliation; dehydrated skin needs intensive hydration; congested skin benefits from clarifying ingredients.
The Complete At-Home Facial Protocol: Step-by-Step
Step 1: Double Cleansing (5-7 minutes)
Purpose: Remove makeup, sunscreen, pollution, and surface impurities without stripping the skin.
Technique:
- First cleanse (oil-based): Apply oil cleanser or cleansing balm to dry skin. Massage gently in upward, circular motions for 60 seconds, focusing on areas with makeup or sunscreen. Emulsify with water and rinse thoroughly.
- Second cleanse (water-based): Apply gentle foaming or cream cleanser to damp skin. Massage for 60 seconds using upward strokes. Rinse with lukewarm water and pat dry with a clean towel.
Scientific rationale: Double cleansing ensures complete removal of oil-soluble impurities (makeup, sebum, pollution) followed by water-soluble debris (sweat, dead skin cells). This prepares skin for optimal product penetration.
Product recommendations:
- Oily/acne-prone: Lightweight oil cleanser with grapeseed or jojoba oil
- Dry/sensitive: Cream or balm cleanser with ceramides or squalane
- Normal/combination: Gel or foaming cleanser with balanced pH
Step 2: Exfoliation (3-5 minutes, 1-2x weekly)
Purpose: Remove dead skin cells, improve texture, enhance product penetration, and stimulate cell turnover.
Technique:
- Chemical exfoliation (preferred): Apply AHA (glycolic or lactic acid) or BHA (salicylic acid) to dry skin. Leave on for 3-5 minutes (or as directed). Rinse if product instructions require, or leave on if it's a leave-on formula.
- Gentle physical exfoliation (optional): If using a physical exfoliant, apply to damp skin and massage very gently in circular motions for 30-60 seconds maximum. Rinse thoroughly.
Scientific rationale: Chemical exfoliants dissolve the bonds between dead skin cells, promoting even exfoliation without the micro-tears caused by harsh physical scrubs. AHAs (alpha hydroxy acids) work on the skin's surface; BHAs (beta hydroxy acids) penetrate oil to clear pores.
Frequency guidelines:
- Normal/combination: 2x weekly
- Oily/acne-prone: 2-3x weekly with BHA
- Dry/sensitive: 1x weekly with gentle AHA (lactic acid or PHA)
- Mature skin: 2x weekly with glycolic acid for anti-aging benefits
Safety notes: Never exfoliate if skin is irritated, sunburned, or compromised. Always follow with hydration and sunscreen (AHAs increase sun sensitivity).
Step 3: Steam and Open Pores (5-10 minutes)
Purpose: Soften debris in pores, increase circulation, enhance product penetration, and prepare skin for extraction (if performing).
Technique:
- Facial steamer method: Fill steamer with distilled water. Position face 12-18 inches from steam source. Steam for 5-10 minutes, covering head with a towel to trap steam.
- Hot towel method: Soak clean towels in hot (not scalding) water. Wring out excess water and apply to face for 2-3 minutes. Repeat 2-3 times.
- Bowl method: Boil water, pour into a heat-safe bowl. Position face 12 inches above bowl, cover head with towel, and steam for 5-10 minutes.
Scientific rationale: Heat and moisture soften sebum and debris in pores, making extraction easier and less traumatic. Steam also increases skin temperature, temporarily boosting circulation and product absorption.
Safety precautions:
- Keep face at least 12 inches from steam source to prevent burns
- Limit steaming to 10 minutes maximum to avoid over-hydration and barrier compromise
- Do not steam if you have rosacea, broken capillaries, or active inflammation
- Discontinue immediately if you feel dizzy or uncomfortable
Additions for enhanced benefits:
- Herbal steam: Add dried chamomile, lavender, or green tea to water for soothing benefits
- Essential oils: Add 1-2 drops of tea tree (acne-prone) or eucalyptus (congestion) oil—never use undiluted
Step 4: Extraction (Optional, 5-10 minutes)
Purpose: Remove blackheads and superficial congestion.
Important disclaimer: Extraction carries risks of scarring, infection, and post-inflammatory hyperpigmentation if performed incorrectly. If you're unsure, skip this step or consult a professional.
Safe extraction technique (for superficial blackheads only):
- Wrap fingers: Wrap index fingers with clean tissue or cotton pads
- Apply gentle pressure: Press gently on either side of the blackhead
- Stop if resistant: If the blackhead doesn't release with gentle pressure, do not force it
- Never use nails: Nails can cause micro-tears and introduce bacteria
- Disinfect after: Apply a soothing toner or antiseptic (witch hazel or tea tree water) to extracted areas
What NOT to extract:
- Cystic or inflamed acne
- Deep whiteheads
- Anything that causes pain
- Milia (small white bumps that require professional extraction)
Alternative to extraction: Use a clay mask or BHA treatment to gradually clear congestion without manual extraction.
Step 5: Treatment Mask (10-20 minutes)
Purpose: Deliver concentrated active ingredients to address specific concerns.
Mask selection by concern:
Hydration/Dryness:
- Ingredients: Hyaluronic acid, glycerin, aloe vera, honey, ceramides
- DIY option: Mix 1 tbsp honey + 1 tsp aloe vera gel + 2 drops glycerin
- Application: Apply thick layer to damp skin. Leave 15-20 minutes. Rinse with lukewarm water.
Brightening/Dullness:
- Ingredients: Vitamin C, niacinamide, licorice root, kojic acid, alpha arbutin
- DIY option: Mix 1 tbsp plain yogurt + 1 tsp turmeric + 1 tsp honey (patch test first)
- Application: Apply evenly. Leave 10-15 minutes. Rinse thoroughly.
Acne/Congestion:
- Ingredients: Clay (kaolin, bentonite), salicylic acid, sulfur, tea tree oil, charcoal
- DIY option: Mix 1 tbsp bentonite clay + 1 tsp apple cider vinegar + water to form paste
- Application: Apply to damp skin. Leave until mask begins to dry (10-15 minutes). Rinse before fully dry to avoid over-drying.
Anti-Aging:
- Ingredients: Retinol, peptides, antioxidants (vitamin C, E, ferulic acid), niacinamide
- DIY option: Mix 1 mashed avocado + 1 tsp honey + 2 drops rosehip oil
- Application: Apply thick layer. Leave 15-20 minutes. Rinse gently.
Sensitive/Calming:
- Ingredients: Centella asiatica, oat extract, aloe vera, chamomile, allantoin
- DIY option: Mix 1 tbsp colloidal oatmeal + 1 tsp honey + enough water to form paste
- Application: Apply gently. Leave 10-15 minutes. Rinse with cool water.
Application technique:
- Cleanse hands thoroughly or use a clean brush/spatula
- Apply mask in upward, outward strokes, avoiding eye and lip areas
- Apply thicker layer on areas of concern (T-zone for oily skin, cheeks for dry skin)
- Relax and avoid talking or moving facial muscles excessively
- Set a timer to avoid over-leaving
- Rinse with lukewarm water using gentle circular motions
- Pat dry with clean towel
Step 6: Facial Massage and Lymphatic Drainage (5-10 minutes)
Purpose: Improve circulation, reduce puffiness, enhance product absorption, relieve tension, and promote lymphatic drainage.
Preparation: Apply a facial oil or serum to provide slip and prevent pulling.
Basic massage techniques:
Effleurage (gliding strokes):
- Use fingertips or palms
- Apply light to medium pressure
- Stroke upward and outward from center of face
- Repeat 5-10 times per area
Petrissage (kneading):
- Use fingertips to gently knead muscles
- Focus on jawline, cheeks, and forehead
- Use circular motions with light pressure
- Repeat 3-5 times per area
Lymphatic drainage:
- Use very light pressure (the weight of a coin)
- Always stroke toward lymph nodes (ears, jawline, neck)
- Start at center of forehead, stroke outward to temples
- From nose, stroke outward along cheekbones to ears
- From chin, stroke along jawline to ears
- Finish by stroking down sides of neck to collarbone
- Repeat sequence 3-5 times
Tools for enhanced massage:
- Jade roller: Use larger end for cheeks/forehead, smaller end for under-eyes. Roll upward and outward. Store in refrigerator for cooling effect.
- Gua sha: Hold at 15-degree angle to skin. Use gentle pressure and upward/outward strokes. Clean after each use.
- Facial massage devices: Electronic devices with vibration or microcurrent can enhance results but require proper instruction.
Scientific benefits: Research in the Journal of Physical Therapy Science shows that facial massage increases blood flow, improves skin elasticity, and reduces puffiness through enhanced lymphatic drainage.
Step 7: Serum Application (2-3 minutes)
Purpose: Deliver concentrated active ingredients to address specific concerns.
Application technique:
- Dispense 2-3 drops (or pea-sized amount) onto fingertips
- Warm between palms briefly
- Press (don't rub) onto face and neck
- Allow 1-2 minutes for absorption before next step
Serum layering order (if using multiple):
- Water-based serums first (hyaluronic acid, vitamin C)
- Treatment serums second (niacinamide, peptides)
- Oil-based serums last (facial oils, retinol in oil base)
Common serum ingredients and benefits:
- Hyaluronic acid: Intense hydration, plumping
- Vitamin C: Brightening, antioxidant protection, collagen synthesis
- Niacinamide: Pore refinement, oil regulation, barrier support
- Peptides: Collagen stimulation, anti-aging
- Retinol: Cell turnover, anti-aging, acne treatment (use at night only)
- Azelaic acid: Brightening, acne treatment, rosacea support
Step 8: Moisturizer and Seal (2-3 minutes)
Purpose: Lock in hydration, support barrier function, and protect skin.
Application technique:
- Dispense pea-sized amount onto fingertips
- Warm between palms
- Press and gently massage onto face and neck using upward strokes
- Don't forget eye area (use eye cream if preferred)
Moisturizer selection:
- Oily/acne-prone: Lightweight gel or lotion with non-comedogenic ingredients
- Dry/mature: Richer cream with ceramides, fatty acids, and occlusives
- Normal/combination: Balanced lotion or light cream
- Sensitive: Fragrance-free formula with soothing ingredients (centella, oat, panthenol)
Daytime addition: If performing facial during the day, finish with broad-spectrum SPF 30+ as the final step.
Customizing Your At-Home Facial for Different Skin Types
Oily and Acne-Prone Skin
Focus: Oil control, pore clearing, anti-bacterial action, non-comedogenic products
Recommended adjustments:
- Cleanser: Gel or foaming cleanser with salicylic acid or tea tree oil
- Exfoliant: BHA (salicylic acid 1-2%) 2-3x weekly
- Mask: Clay mask (kaolin or bentonite) with sulfur or tea tree
- Serum: Niacinamide 5-10% for oil regulation
- Moisturizer: Oil-free, non-comedogenic gel or lightweight lotion
- Avoid: Heavy oils, occlusive ingredients, over-exfoliation
Frequency: Full facial 1x weekly; simplified routine 2-3x weekly
Dry and Dehydrated Skin
Focus: Intense hydration, barrier repair, gentle treatment
Recommended adjustments:
- Cleanser: Cream or oil-based cleanser with ceramides or squalane
- Exfoliant: Gentle AHA (lactic acid 5%) or PHA 1x weekly maximum
- Steam: Extend to 10 minutes for maximum hydration
- Mask: Hydrating mask with hyaluronic acid, honey, or aloe
- Serum: Hyaluronic acid + barrier-supporting ingredients (ceramides, peptides)
- Moisturizer: Rich cream with occlusives (shea butter, squalane)
- Avoid: Harsh physical scrubs, alcohol-based products, over-cleansing
Frequency: Full facial 1x weekly; hydrating mask 2-3x weekly
Sensitive and Reactive Skin
Focus: Soothing, barrier support, minimal irritation
Recommended adjustments:
- Cleanser: Ultra-gentle, fragrance-free cream or milk cleanser
- Exfoliant: Skip or use extremely gentle PHA 1x every 2 weeks
- Steam: Reduce to 3-5 minutes or skip if rosacea-prone
- Mask: Calming mask with centella, oat, aloe, or chamomile
- Serum: Soothing ingredients (panthenol, centella, madecassoside)
- Moisturizer: Barrier-repair cream with ceramides and cholesterol
- Avoid: Fragrance, essential oils, alcohol, physical scrubs, strong acids
Frequency: Simplified facial 1x weekly; patch test all new products
Mature and Aging Skin
Focus: Anti-aging, collagen support, hydration, gentle exfoliation
Recommended adjustments:
- Cleanser: Cream or oil cleanser with anti-aging ingredients
- Exfoliant: Glycolic acid 5-10% 2x weekly for cell turnover
- Steam: 5-7 minutes to enhance penetration
- Mask: Anti-aging mask with peptides, antioxidants, or retinol
- Serum: Vitamin C (morning) or retinol (evening) + peptides
- Moisturizer: Rich cream with ceramides, peptides, and antioxidants
- Massage: Extend to 10 minutes for circulation and lymphatic drainage
Frequency: Full facial 1x weekly; targeted treatments 2-3x weekly
Advanced At-Home Facial Techniques
Multi-Masking
Concept: Apply different masks to different areas of the face based on zone-specific concerns.
Example for combination skin:
- T-zone (oily): Clay mask to absorb oil and clear pores
- Cheeks (dry): Hydrating mask with hyaluronic acid or honey
- Under-eyes: Gentle hydrating gel mask or cucumber slices
Application: Apply each mask to designated areas simultaneously. Leave on for 10-15 minutes. Rinse thoroughly.
Facial Cupping (Advanced)
Purpose: Increase circulation, reduce puffiness, promote lymphatic drainage.
Safety note: Requires proper training. Incorrect technique can cause bruising or broken capillaries.
Basic technique:
- Apply facial oil for slip
- Use small silicone cups designed for face
- Create gentle suction (never painful)
- Glide in upward/outward motions
- Limit to 5 minutes maximum
- Avoid if you have rosacea, broken capillaries, or active acne
LED Light Therapy at Home
Technology: At-home LED devices use specific wavelengths to target concerns.
Wavelengths and benefits:
- Red light (630-700nm): Collagen stimulation, anti-aging, wound healing
- Blue light (400-470nm): Anti-bacterial, acne treatment
- Amber/Yellow (570-590nm): Redness reduction, circulation
Usage: Follow device instructions carefully. Typically 10-20 minutes, 3-5x weekly. Wear eye protection. Consistency is key for results.
Common At-Home Facial Mistakes to Avoid
Mistake 1: Over-Exfoliating
The problem: Exfoliating too frequently or using multiple exfoliants compromises the skin barrier, leading to sensitivity, dryness, and breakouts.
The fix: Limit chemical exfoliation to 1-3x weekly based on skin type. Never combine multiple exfoliants in one session. Always follow with hydration and barrier support.
Mistake 2: Skipping Patch Tests
The problem: Applying new products to your entire face without testing can cause severe allergic reactions or irritation.
The fix: Always patch test new products on a small area (behind ear or inner arm) 24-48 hours before full-face application.
Mistake 3: Using Dirty Tools
The problem: Bacteria on brushes, sponges, or hands can cause breakouts and infections.
The fix: Clean all tools before and after each use. Wash brushes weekly with gentle soap. Replace sponges monthly. Always wash hands before touching your face.
Mistake 4: Aggressive Extraction
The problem: Forcing extractions causes scarring, infection, and post-inflammatory hyperpigmentation.
The fix: Only extract superficial blackheads with gentle pressure. If it doesn't release easily, leave it alone. Consider professional extraction for stubborn congestion.
Mistake 5: Over-Masking
The problem: Leaving masks on too long or using them too frequently can irritate skin or cause over-hydration (which paradoxically leads to dryness).
The fix: Follow product instructions for timing. Limit clay masks to 10-15 minutes. Hydrating masks can stay on 15-20 minutes. Never let masks fully dry on skin.
Mistake 6: Skipping Sunscreen After Exfoliation
The problem: AHAs and BHAs increase sun sensitivity. Skipping SPF leads to sun damage and hyperpigmentation.
The fix: Always apply broad-spectrum SPF 30+ after exfoliation, even if staying indoors. Reapply every 2 hours with sun exposure.
Post-Facial Care: Maximizing and Maintaining Results
Immediate Aftercare (First 24 Hours)
Avoid:
- Active ingredients (retinol, strong acids, vitamin C)
- Harsh physical exfoliation
- Hot water or steam
- Heavy makeup (if possible)
- Direct sun exposure
Do:
- Use gentle, hydrating products only
- Apply broad-spectrum SPF 30+
- Stay hydrated (drink water)
- Use cool compresses if skin feels warm or sensitive
- Allow skin to rest and recover
Maintaining Results (Ongoing)
Daily routine:
- Gentle cleansing twice daily
- Hydration appropriate for your skin type
- Daily broad-spectrum SPF 30+
- Targeted serums for specific concerns
Weekly maintenance:
- Exfoliation 1-2x weekly
- Treatment mask 1x weekly
- Facial massage 2-3x weekly
Monthly assessment:
- Evaluate skin concerns and adjust products
- Consider professional treatment for advanced concerns
- Replace expired products
When to See a Professional
While at-home facials are excellent for maintenance, certain situations require professional expertise:
Seek professional care if you experience:
- Persistent acne that doesn't respond to at-home treatment
- Sudden changes in skin (new moles, unusual growths)
- Severe sensitivity or allergic reactions
- Rosacea or eczema flares
- Desire for advanced treatments (strong peels, microneedling, laser)
- Scarring or hyperpigmentation concerns
- Uncertainty about your skin condition or appropriate treatments
Professional treatments that complement at-home care:
- Medical-grade chemical peels
- Microneedling (professional depth)
- Laser and light therapies
- Professional extractions
- Injectable treatments (Botox, fillers)
- Medical diagnosis and treatment of skin conditions
Frequently Asked Questions
How often should I do a full at-home facial?
For most skin types, a full at-home facial once weekly is ideal. Those with sensitive skin may benefit from every other week, while oily skin can tolerate 2x weekly simplified facials. Listen to your skin—if it feels irritated or sensitive, reduce frequency.
Can I do an at-home facial if I have active acne?
Yes, but modify your approach. Skip steaming and extraction on active breakouts. Use gentle, non-comedogenic products. Focus on soothing ingredients (niacinamide, centella, tea tree). Avoid harsh scrubs or strong acids on inflamed areas. If acne is severe, consult a dermatologist.
Are DIY masks as effective as store-bought?
DIY masks can provide hydration and soothing benefits, but they lack the stability, penetration enhancers, and precise concentrations of professional formulations. Use DIY masks for occasional pampering, but rely on evidence-based products for treating specific concerns.
How long before I see results from at-home facials?
Immediate benefits (hydration, radiance) appear after the first facial. Cumulative improvements (texture, tone, fine lines) typically require 4-8 weeks of consistent weekly facials. Anti-aging benefits may take 3-6 months of consistent care.
Can I combine multiple active ingredients in one facial?
Generally, no. Combining actives (vitamin C + retinol, AHA + BHA, etc.) increases irritation risk. Layer products strategically: water-based first, then treatments, then oils. If using multiple actives, alternate days or use different actives morning vs. evening.
Conclusion: Empowering Your Skin Care Journey
At-home facials are more than a beauty ritual—they're an investment in your skin's long-term health and radiance. By understanding your skin's unique needs, applying evidence-based techniques, and maintaining consistency, you can achieve professional-level results in the comfort of your home.
Remember: Skincare is a journey, not a destination. Your skin changes with seasons, stress, hormones, and age. Stay curious, observe how your skin responds, and adjust your routine accordingly. What works today may need modification tomorrow.
Start where you are. You don't need expensive tools or a dozen products to begin. Start with the basics: gentle cleansing, appropriate exfoliation, targeted treatment, and consistent hydration. Build from there as you learn what your skin loves.
Trust the process. Sustainable skin health comes from consistent, gentle care—not quick fixes or aggressive treatments. Honor your skin's natural rhythms, protect its barrier, and nourish it with ingredients that support its inherent ability to heal and regenerate.
Your skin tells your story. Treat it with the respect, knowledge, and care it deserves. With the science-backed techniques and dermatologist-approved strategies in this guide, you're equipped to create a personalized at-home facial practice that delivers radiant, healthy skin for years to come.
Your best skin is within reach. Start your at-home facial journey today.